Friday, August 29, 2008

How Beautiful This Night

How beautiful this night. You wouldn’t be able to tell by the tears streaming down my face or by my trembling fingers as I attempt to capture this moment. How beautiful this night for I have seen the unabashed glory of God. Forty-five years ago tonight, a Negro dared to dream; 45 years later, an African-American had the audacity to hope. How beautiful this night. Forty-five years ago, a colored man who foretold the problem of the Twentieth Century would be the problem of the colored line passed away. How beautiful this night because black and white hold hands across that line – realizing that history is being made.
How beautiful this night, even though I see ghosts who share my tears. I see Fannie Lou Hamer. I see Shirley Chisholm. I see Medgar Evers, Malcolm X and Martin Luther King Jr. I see Sojourner Truth. I see Emmett Till. I see them at true peace because yes, on this night, we have affirmed it was worth it. How beautiful this night.

Wednesday, August 27, 2008

My Trip to the Farmers Market

I love the farmers markets. I usually make it to at least one every weekend. I stopped by after church on this visit. I knew I wanted zucchini and mint for a salad. Whatever else I purchased would be inspired by the selection. That's my key to shopping at farmers markets -- go with at least one dish in mind. Otherwise, I tend end up with a lot of stuff that "don't match." "Koolaid no sugar. Peanut butter, no jelly." Yep, one of the funniest movies ever. I digress. On this trip, I picked up garlic, onion, okra, tomatoes and corn. I had some hot turkey sausage in the freezer -- the makings of a meal. I was completely winging it. Here we go.
Grab a Dutch oven and brown the turkey sausage. Don’t cook it all the way.
Look at all that wonderful fond. Don’t waste it!
Throw in some chopped onion. Use the moisture from the onion to soften the fond.
Add the garlic on top of the onion.
Moving on. Add the fresh corn. I threw in the cobs too for additional flavor.
Add the okra.
Tomatoes.
I hope you have been seasoning with salt and pepper at each addition. Add the sausage plus a little water and cover.
While that simmers, let’s get to the zucchini salad. Thinly slice onion and finely chop a garlic clove.
Grab you favorite peeler and peel the zucchini until you get to the seeds. Turn it and attack it from the other side.
Add olive oil, lemon juice and lemon zest.
Add feta (I’m using reduced fat) and mint. Add a good amount of freshly ground black pepper. My feta was so salty that I didn’t need any salt.
That is a mighty fine meal for someone who was winging it.
Tools of the trade:

Sunday, August 24, 2008

Salt & Pepper

So, I wanted to see if I could cook an entire meal using only salt and pepper. Please don't try this with any type of salt and some pepper from a jar. You'll need kosher salt and freshly ground black pepper.
Since it was the weekend and I was cooking for the week. I made chicken and and salmon. Brine the chicken. To stick with my theme, I just used kosher salt. No cheating.
Move on to the salmon. Pat dry and season with salt and pepper. I'm serious. This is a theme.
Get thee to a hot skillet. High heat to caramelize both sides. Remove from pan and cover with foil. Let the carryover cooking do its thing.
Isn't that lovely?
Back to the chicken for a second. Isn't that gorgeous? High heat to caramelize both sides. Remove from pan and cover with foil. Let the carryover cooking do its thing. Sound familiar?
Yes it was very juicy. I forgot to mention that because you brined it, you don't need to add any more salt. Just use the pepper.
Now for the sides, I kept it simple: roasted broccoli (without the lemon) and sliced tomatoes. Hey, I got to use my favorite tomato knife.
Simple is good. My salt and pepper meal was wonderful.

Tools of the trade:

Wednesday, August 20, 2008

More Adventures In Cake Decorating

I finished Wilton III! I know this may not seem like a big deal to you, but this was my third attempt at this class. It is a huge deal for me. My lily nail flowers suck, but whatever. I’m loving the gum paste flowers better than the butter cream versions. I think I may take the advanced class one day. It’s a little pricey.
Anyhoo, here’s how I got to the above cake. Well ... it’s not a real cake; it’s Styrofoam covered in fondant. Start with a mat an your fondant.
Knead in a little Gum-Text or another type of gum and your icing color. Let me say now that none of my colors turned out the way I wanted them. I worked it out with a ribbon to pull everything together.
After kneading, roll the fondant out very thin. Work quickly. (This will be an ongoing theme.)
Next, use the smallest flower cutter and cut several shapes.
Take two or three and roll them into a teardrop shape. Make sure the others are covered with plastic wrap. (This is another theme.)
Dip a toothpick into shortening and insert into the base of the teardrop.
You can stick the whole thing into a Styrofoam cup to harden.
Now that we’ve made the rose bases, let’s move to the petals. Using the large flower cutter, cut out three petals.
Grab one and cover the other two. Using a small spatula, cut a five small slits into each petal. Do this on your thin foam.
Using the ball tool, soften the edges of the petals. Move the petal to the thick foam and use the ball tool to cup the center of the petal.
There are no pics of the next few steps, but shape the first blossom around the base. Brush on clear vanilla to get the fondant to adhere to itself. Move on to the second petal. Once it's shaped, form it around the rosebud.
After your third petal, you have a beautiful bloomed rose!
Get fancy and make some in a second color. I used too much Gum-Text and my flowers dried ashen.
Keep going until you have enough flowers for your cake.
Now. There are no pics of me covering the Styrofoam/cake in fondant. Color the fondant, roll it thin and drape over the cake. Work quickly. Very quickly. Press the sides down first and remove and buckling. Trim the excess and smooth the top with a fondant smoother.
You can use buttercream to stick the flowers to the fondant. I piled mine on the top sans buttercream. (I was going to throw the Styrofoam away and reuse the flowers.) Now, because my colors did not turn out the way I wanted them to and because I was not going to pipe any trim, I used ribbon to finish the cake.

Not too shabby if I do say so myself.

Tools of the trade:

Monday, August 18, 2008

Buy The Book #1: Williams-Sonoma Ice Cream
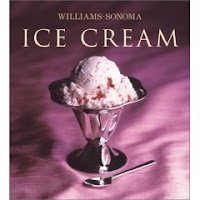
Welcome to the series where I cook something from each of my cookbooks. I have 85 and counting, so we have a lot of possibilities. I follow the recipe by the book to prove that you should buy the book. First up? Williams-Sonoma Ice Cream. Let’s make fresh strawberry ice cream!

I have to admit, I struggled with the book choice for ice cream. It was this book vs. Ben & Jerry's Homemade Ice Cream & Dessert Book. I chose WS because its recipe didn’t contain any eggs. I figured no eggs would be slightly healthier. Besides, there will be Cherry Garcia from the Ben & Jerry’s book later. (It’s my all-time favorite ice cream.)

This is so simple! Dairy (cream and milk), sugar and vanilla are the base. Mix all of the liquids. Add a pinch of salt.

The sugar is next. Add the dairy and stir until the sugar dissolves. The instructions say to let the base sit out for 15 minutes before refrigerating. Stir occasionally. I’m not sure why you couldn’t put it in the refrigerator immediately. Anyhoo, chill the base for at least three hours.

In the meantime, get the strawberries. Quarter them and let them sit for an hour. I added a little sugar and Kirsch. Mash about half of them.

Add the strawberries and their juice to the base.

Let’s churn!!!! To the ice cream maker we go.

Churn, Baby Churn!

You should now have yummy soft-serve ice cream. Hey, stop eating it! Pour it into a freezer-safe container.

Press plastic wrap right down on the surface. Put the lid on and freeze.

Do not try to lick the ice cream maker.

Well now. Isn't that special?

Tasty. Tasty. Tasty.