Showing posts with label Cook's Illustrated. Show all posts

Saturday, November 6, 2010

I'm Makin' Waffles!

I loved when Donkey said, "I'm makin' waffles!" in Shrek. Good times. Anyhoo. I was unable again to pass up buttermilk in the store, so now I have to use it before it goes bad. I've had it for a week and I can't remember why I bought it.

Use #1:  Cook's Illustrated's Buttermilk Waffles for Two

You see before you AP flour, cornmeal, salt, and baking soda. There's buttermilk (of course), melted butter, and a separated egg. The egg white has a pinch of cream or tartar.


Now, get to combining.  Whisk all of the dry ingredients and make a well in the center.


Beat the egg yolk and add the melted butter. Whisk together and add that to the buttermilk.


Whip out your hand mixer and attack the egg white. Sparkle performed nicely. You're looking for stiff peaks.


Fold the liquid in to the dry ingredients. Please don't over mix. Looks like a sticky biscuit dough, huh?


We've gone through this before, but it bears repeating. You must make a sacrifice to the mixing gods. Take about 1/4 of the egg white and dump them into the bowl. Don't mix these with wild abandon because you'll jack up the dough. What you want to do is get the egg white incorporated so that it lightens the dough some. The rest of the egg white will live a happier life because of it.

Gently fold in the rest of the egg white.


Hope you were preheating the waffle iron during all of this; I was.


I rarely make waffles without pecans. Close the lid and seal the deal. Have syrup and more butter waiting in the wings.


Yummy!

Tools of the Trade

Saturday, July 17, 2010

Summer Baking

It was absolutely blazing earlier today.  I was slightly miffed because I had to go outside and because I had to turn the oven on.  In hindsight, the oven part isn't so bad.

The baking need arose from a container of plums I got from Costco a couple of days ago.  I was about to purchase $9 cherries, when I spotted $5 plums.  I made a quick switch.  Once I got the plums home, I realized that they were extremely ripe.  They were so ripe that they tasted a little like pears.  These would need to star in a crumble or a crisp real soon.

Baking IllustratedOnce I realized that I wouldn't finish the sewing project I was working on in time, I decided to take a break and head to the kitchen.  Here's what I came up with:  a plum crisp.  I adapted the recipe from Baking Illustrated.  If you've read my blog in the past, you know I am an America's Test Kitchen believer.

Starting here was a no-brainer since I had limited time and patience.  (I wanted to get back to the other hobby.)  This recipe was amazingly simple.  I think it went together in less than 20 minutes.

Make the topping first.  Flour, brown sugar, granulated sugar, cinnamon, nutmeg (freshly ground, please) and salt go for a spin in the food processor.  It's been a while since Miracle and I have hung out.


Add the butter and pulse until you get something that looks like wet sand.  Chill immediately.  (Not you, the topping.)


Move on to the fruit.  The recipe called for sliced fruit, sugar, lemon zest and lemon juice.  I had two of the four.  If substituting plums for apples, CI wanted me to have tapioca pudding too.  Yeah right.
Since my plums were very ripe (look at 'em; they look like beets), I used about a couple of tablespoons of sugar.  For the acid, I thought balsamic vinegar would be hot.  Don't sleep on balsamic vinegar and fruit.  It will change your relationship with strawberry shortcake forever. I used about 1 1/2 Tbs.  I used a tablespoon of cornstarch in place of the tapioca.
Let's assemble. Dump the fruit into a buttered baking dish.  


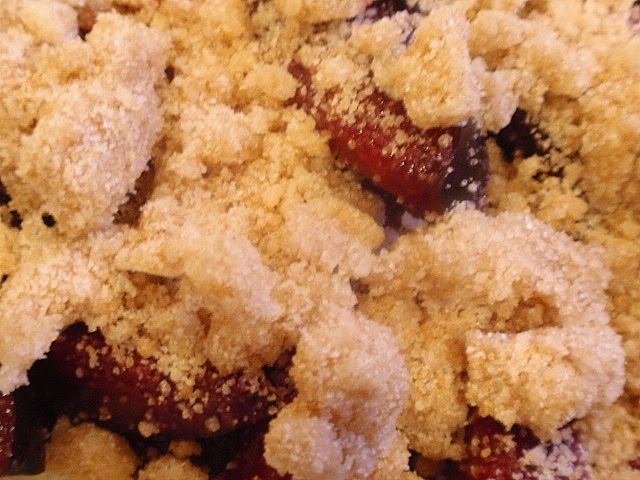
Creatively distribute the topping over the fruit. Ain't that pretty?


Get thee to a pre-heated oven.  I let it bake at 375 for 30 minutes and then jacked up the heat to 400 for browning.


Hallelujah!! All I need is some white ice cream (my uncles' term for vanilla ice cream.)

Tools of the trade

Saturday, December 13, 2008

Buy The Book #4: Cook's Illustrated 2003 Annual

Whenever I can knock out a killer breakfast, I am a happy camper. One of the things I do love for breakfast is cornmeal pancakes. Many a day I opened a box of Jiffy for pancakes and not cornbread. That is until I discovered lemon-cornmeal blueberry pancakes in 2003.
This was the year I bought my first CI Annual. If you haven't figured it out, I believe the folks at Cook's Illustrated author the best recipes. Perhaps a third or more of my cookbook collection is from CI. I think this recipe is the one I use most from the 2003 volume. It truly is a breakfast favorite.
Let's get started. This is all you need to make these wonderful pancakes. I would've preferred fresh blueberries, but it's winter. I'll make do with frozen. And yes, the use of prep bowls really does help.
Start by stirring your lemon zest and lemon juice into the milk. Yep. You're making buttermilk. Let it sit for a while to thicken. You can easily use buttermilk and just add the zest. I feel Sunday biscuits coming on, so I'm saving the real buttermilk for that.
Mix the egg and melted butter.
Now, mix all of your dry ingredients. I do this in two stages, cornmeal and flour and then the baking powder, baking soda, sugar and salt into the cornmeal and flour.
Dump the egg mixture into the milk and give it a whisk. Next, make a well in the center of the dry ingredients and mix in the milk mixture. I start with a whisk and then switch to a spatula. Please don't overmix. Lumps are okay. Completely smooth batter means tough pancakes and who wants that?
I used a large scoop to portion the batter. I don't care about perfectly round pancakes. This is a good thing because I can't make them! I do have some egg rings that I could use if I needed to impress somebody. After the batter is in the pan, sprinkle the blueberries across each pancake.
I am pining for a Le Crueset double-burner reversible grill and griddle. Until then, a large skillet will have to do. I added a little more oil than I should have and the heat was up a touch higher than it needed to be. Therefore, the first batch fried a little. Once you see the edges of the pancakes start to dry out (you'll see the bubbles), give the pancakes a flip. On my stove, liquids tend to pool on one side, so one pancake got a lot of hot oil. Can you tell which one?
When the bottom side has set, remove the pancakes to a plate and work it out with some syrup and butter. I also had some maple glazed turkey bacon going on the side. Add some rich coffee made from freshly-ground beans and you'd think you're at a fancy restaurant.
A couple of things would've made this better -- breakfast in bed and breakfast before noon! No matter. All was right with the world after the first bite.
These also freeze well. I stack them between parchment paper. I intentionally undercook each batch after the first, so that the frozen ones will be a little more forgiving when reheated.
Tools of the trade:

Tuesday, July 1, 2008

So Pretty

Yes. More cupcakes. What's really surprising is that I lost weight this week, even with these and pound cake. Anyhoo. These were for a coworker's birthday.

I am an official cupcake convert. I love them for portion control and decorating ease. I've taken the Wilton cake decorating classes (with some degree of success); I just am not the type of person to sculpt something with fondant. I prefer the simple elegance of cupcakes. Many of the more popular bakeries have a standard way of applying the icing, not matter the cupcake variety. Perhaps the most famous is Sprinkles, in LA. I like that standardization.

Anyway, I'm a swirl kinda girl, although I'm still trying to get mine to look like these from Blue Cupcake. In hindsight, think it's a large rosette. Mine are like ice cream cone swirls.
So, I decided to make a cupcake version of the strawberry cream cake by Cook's Illustrated. From previous miserable experiences, I knew better than to mess with an egg-foam cake. I turned to the All Occasion Downy Butter Cake by baker extraordinaire Rose Levy Beranbaum. You know I've had a jones for sweet potato and caramel brought together as a dessert, so I decided to go for that too.
Before we get started, let me just say how thankful I was for two KitchenAid stand mixer bowls. I'm thinking about purchasing a second paddle and whisk too. I didn't take any cake-in-progress pics for the cupcake part of the strawberry cream cake, but you know the drill, don't you? While your cupcakes bake, move on to the strawberries.
Quarter them and toss with sugar. Let them sit for an hour. Stir periodically. You should end up with this:
Drain and reserve the liquid. Give the berries a good mash. CI suggests a food processor. I didn't want to dirty another appliance. Pour the strawberry juices into a small saucepan. Add some Kirsch and reduce until it becomes a syrup. Add this to the mashed berries.
Now grab some strawberries and slice them thin. Place these on the outer edges of the cupcake like a border. Spoon a little bit of the mashed berry mixture into the center.
Now let's move to the topping. Whip room temperature cream cheese and sugar until smooth. Don't try to cheat and use cold cream cheese. You will have lumps. And lumps aren't cute are they? Nope. Add cold heavy cream and vanilla. Whip until fluffy.

No fancy piping needed for decoration. In this case, the unfussy dollop of the cream really underscored the real strawberries, real cream cheese and real whipped cream. Natural is good.
Add a strawberry slice to the center and you're done!

Now let's get to the sweet potato caramel. These would have been perfect if there were one less stick of butter in the icing. That's just my preference. Everybody else loved them. Let's keep it moving. The base recipe is CI's Yellow Cupcakes. I took leap of faith and tried to strike a balance between the sour cream and mashed sweet potato.
Roast your sweet potato. I'll take roasting over boiling any day. I think some of the flavor boils right out into the water.

Mash while hot or you will have strings. Strings are not a good thing.


Sorry, no pics of me making the cake. I was going for speed. So pretend I listed all of the steps and took pics. Here's what you end up with: orange-colored goodness.
Now for the frosting -- caramel Italian meringue buttercream. Very ambitious. Especially first thing in the morning. I got up to make it and the cream topping at midnight. I realized that I was in no shape to do anything that required precision, so I went back to bed until 4. That didn't help much because I burned the first batch of caramel!
What's so cool about this icing is that it's like a song with four movements: crème anglaise,


caramel (yes this eventually turned into caramel),

meringue,


and butter (and lots of it).
Here's the result. Beranbaum's recipe called for four sticks of butter. I found that while the icing was unbelievably silky and light, I tasted more butter than caramel. I'm going to try it with three sticks next time.
Grab a piping bag and tip and have at it.
Now my ultimate flavor combo is sweet potato, caramel and pecan. I chopped a few nuts for the folks to sprinkle on their own. I didn't want hurt anyone with severe nut allergies. Um, yeah. I had to try one. 'Twas great!
All packed up and ready to go!


Tools of the trade: