Showing posts with label KitchenAid. Show all posts

Friday, December 23, 2011

Ode to Vermont and Canada

I'm so not feeling the Christmas spirit this year. I want a shirt that says, "Bah. Humbug." However, the bright sunny morning cheered me a little and I decided to celebrate the first day of me not checking my Blackberry all day with some scones.  Not just any scones -- maple-glazed pumpkin scones to be exact. I wanted to make these over Thanksgiving, but a family emergency kept me from my kitchen most of my time off.

You've seen the scone recipe before, so let's get to it. It starts pretty much the same; pulse dry ingredients in the food processor.  Add cold butter.

Here's the departure:  make Trader's Joe's Pumpkin Butter your friend. Y'all might even be best friends after this :-)


Mix it into the cream really well. Instead of a full cup of cream, I used 3/4 C. Add the cream to the flour mixture. 


CI has you do this by hand, I just added mine to Miracle and pulsed until it formed a dough.


Now comes the messy part. Dump the dough on the counter. Knead very gently to incorporate all the dry bits. Form a ball or two, depending on how you will shape your scones.


I made two balls because I used a 6" cake pan so I could have mini scones.


Press the dough into the pan.


Invert.


Slice (do a better job than I did.) Remember to press straight down. I'll show you what happens later when you don't.


I did better on the second round.


I started with refrigerated instead of my usual frozen butter, so I parked these in the refrigerator while I took a bacon detour. 


I did say MAPLE pumpkin scones. No way I was going to have a hot oven, maple syrup on the counter and bacon in the refrigerator without making maple-glazed bacon again.


Back to the scones.  I heated some butter and maple syrup together.


I gave the scones a beautiful brush-on tan and to the oven they went.


Here's what I got.


Absolutely delicious! The texture was closer to a biscuit or even cake. I prefer my scones on the drier side, but the flavor made up for the break with tradition. The pumpkin butter was pretty sweet, so I would knock out some of the sugar when I try these again. The maple syrup kept the outside of the scones from getting hard, so next time, I'll make half with the glaze on before baking and put the glaze on the other half after baking to see which I like best. 

With Teavana's English Breakfast Tea, these made a wonderful morning treat. On a side note, here's another vote for Silpat -- the burnt syrup just flakes off. Easy cleanup.


Remember my note to press straight down when cutting? Here's what happens when you don't. He's all crooked :-( I'm working on a granite counter, so I use my bench scraper to cut dough. Moving to a cutting board so I can use my knives is too much work. And even still, I think it's just the way I cut and lack of wrist strength. I sometimes have lopsided biscuits too.


Tools of the trade


Saturday, December 11, 2010

A Keeper

My aunt found this recipe for carrot soufflé. It is now a family favorite. I didn't start dinner until 7 something Sunday night and I had a gang of stuff to do. My goal in life was to make this as quickly as possible using as few dishes as possible. Here's how I did it.

Chop a pound of carrots. This was my lazy cooking night, so I started by breaking them down.


Then, I let Miracle do the work. I put the carrots in a 2-qt pot and added enough water to barely cover them. I know. I know. I've preached about my preference for roasting instead of boiling veggies. Again, I made it to the kitchen around 7 on a Sunday night; boiling was faster. Don't forget to add salt to the water.


Hot fresh carrots! Now, we need to cool things down. Here's where I veer from the recipe. Blend the butter and carrots. My aunt uses a blender; you can mash by hand if you want. I planned on using the FP for as many steps as I could. 


Now add the sugar and blend. Don't forget to scrape the bowl.


By now, the mixture should be cool enough to keep from scrambling your eggs and stealing your vanilla flavor. Add both of those now and blend.


Add flour, salt, and baking powder. Blend some more.


Everything should be all smooth. Pour into a greased baking dish. Is CorningWare French White the official bake ware of America?


Bake for 45 minutes. Isn't it pretty?


Look at that texture. And the taste? Oh man ... You won't believe how good this is! Whenever I run across a killer recipe, I file it in my "Husband-Only" cookbook. I'm single now, but when he finds me, he'll eat well! This one made it in with a gold star.


Tools of the trade:

Saturday, November 6, 2010

I'm Makin' Waffles!

I loved when Donkey said, "I'm makin' waffles!" in Shrek. Good times. Anyhoo. I was unable again to pass up buttermilk in the store, so now I have to use it before it goes bad. I've had it for a week and I can't remember why I bought it.

Use #1:  Cook's Illustrated's Buttermilk Waffles for Two

You see before you AP flour, cornmeal, salt, and baking soda. There's buttermilk (of course), melted butter, and a separated egg. The egg white has a pinch of cream or tartar.


Now, get to combining.  Whisk all of the dry ingredients and make a well in the center.


Beat the egg yolk and add the melted butter. Whisk together and add that to the buttermilk.


Whip out your hand mixer and attack the egg white. Sparkle performed nicely. You're looking for stiff peaks.


Fold the liquid in to the dry ingredients. Please don't over mix. Looks like a sticky biscuit dough, huh?


We've gone through this before, but it bears repeating. You must make a sacrifice to the mixing gods. Take about 1/4 of the egg white and dump them into the bowl. Don't mix these with wild abandon because you'll jack up the dough. What you want to do is get the egg white incorporated so that it lightens the dough some. The rest of the egg white will live a happier life because of it.

Gently fold in the rest of the egg white.


Hope you were preheating the waffle iron during all of this; I was.


I rarely make waffles without pecans. Close the lid and seal the deal. Have syrup and more butter waiting in the wings.


Yummy!

Tools of the Trade

Saturday, July 17, 2010

Summer Baking

It was absolutely blazing earlier today.  I was slightly miffed because I had to go outside and because I had to turn the oven on.  In hindsight, the oven part isn't so bad.

The baking need arose from a container of plums I got from Costco a couple of days ago.  I was about to purchase $9 cherries, when I spotted $5 plums.  I made a quick switch.  Once I got the plums home, I realized that they were extremely ripe.  They were so ripe that they tasted a little like pears.  These would need to star in a crumble or a crisp real soon.

Baking IllustratedOnce I realized that I wouldn't finish the sewing project I was working on in time, I decided to take a break and head to the kitchen.  Here's what I came up with:  a plum crisp.  I adapted the recipe from Baking Illustrated.  If you've read my blog in the past, you know I am an America's Test Kitchen believer.

Starting here was a no-brainer since I had limited time and patience.  (I wanted to get back to the other hobby.)  This recipe was amazingly simple.  I think it went together in less than 20 minutes.

Make the topping first.  Flour, brown sugar, granulated sugar, cinnamon, nutmeg (freshly ground, please) and salt go for a spin in the food processor.  It's been a while since Miracle and I have hung out.


Add the butter and pulse until you get something that looks like wet sand.  Chill immediately.  (Not you, the topping.)


Move on to the fruit.  The recipe called for sliced fruit, sugar, lemon zest and lemon juice.  I had two of the four.  If substituting plums for apples, CI wanted me to have tapioca pudding too.  Yeah right.
Since my plums were very ripe (look at 'em; they look like beets), I used about a couple of tablespoons of sugar.  For the acid, I thought balsamic vinegar would be hot.  Don't sleep on balsamic vinegar and fruit.  It will change your relationship with strawberry shortcake forever. I used about 1 1/2 Tbs.  I used a tablespoon of cornstarch in place of the tapioca.
Let's assemble. Dump the fruit into a buttered baking dish.  


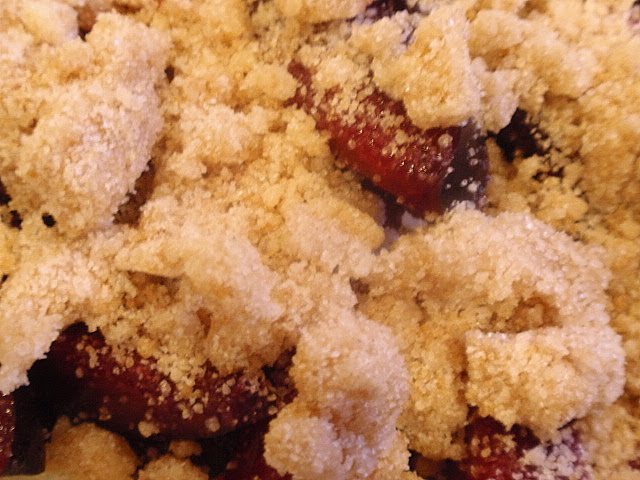
Creatively distribute the topping over the fruit. Ain't that pretty?


Get thee to a pre-heated oven.  I let it bake at 375 for 30 minutes and then jacked up the heat to 400 for browning.


Hallelujah!! All I need is some white ice cream (my uncles' term for vanilla ice cream.)

Tools of the trade