 Welcome to the series where I cook something from each of my cookbooks. I have 85 and counting, so we have a lot of possibilities. I follow the recipe by the book to prove that you should buy the book. First up? Williams-Sonoma Ice Cream. Let’s make fresh strawberry ice cream!
I have to admit, I struggled with the book choice for ice cream. It was this book vs. Ben & Jerry's Homemade Ice Cream & Dessert Book. I chose WS because its recipe didn’t contain any eggs. I figured no eggs would be slightly healthier. Besides, there will be Cherry Garcia from the Ben & Jerry’s book later. (It’s my all-time favorite ice cream.)
This is so simple! Dairy (cream and milk), sugar and vanilla are the base. Mix all of the liquids. Add a pinch of salt.

The sugar is next. Add the dairy and stir until the sugar dissolves. The instructions say to let the base sit out for 15 minutes before refrigerating. Stir occasionally. I’m not sure why you couldn’t put it in the refrigerator immediately. Anyhoo, chill the base for at least three hours.

In the meantime, get the strawberries. Quarter them and let them sit for an hour. I added a little sugar and Kirsch. Mash about half of them.

Add the strawberries and their juice to the base.

Let’s churn!!!! To the ice cream maker we go.

Churn, Baby Churn!

You should now have yummy soft-serve ice cream. Hey, stop eating it! Pour it into a freezer-safe container.

Press plastic wrap right down on the surface. Put the lid on and freeze.

Do not try to lick the ice cream maker.

Well now. Isn't that special?

Tasty. Tasty. Tasty.


 Add the seeds and pod to a pot of dairy.
  Heat on medium heat for five minutes, or until bubbles form around the edges of the pan. Okay, so I had bubbles all over the pan.
  Meanwhile, whisk the egg yolks, sugar and remaining dairy in a bowl. Temper the yolks with the warm mixture.
 Now, set up a straining and rig: large bowl of ice. Smaller bowl nestled inside. (I like using an 8-cup measuring cup.) Place a strainer over the smaller bowl. Strain the custard.
  Once it's strained, stir occasionally to cool (don't let a skin form.) When it's cool enough to refrigerate, cover with plastic wrap and refrigerate. Make sure the wrap is touching the top of the custard. Refrigerate overnight. Now you may entertain yourself by licking the spoon.
  Time to break out the ice cream maker!!! I use a KitchenAid stand mixer and the Ice Cream Maker Attachment. This is a great combo if you are short on counter or storage space. I store the attachment in the freezer. That way it's ready when I need it. Turn the mixer on and pour in the custard.

 Yesterday was Good Friday and it snowed! (This will make it very hard to wear white linen for Easter.) What better time to write about the Saturday I spent making soup? Roasted butternut squash soup is always a favorite. I had some sweet potatoes on hand and I wanted to see what I could do with those and some corn. The result was fabulous. It's now on my list of favorites too.
 Place the halves cut side down on the baking sheet. Use a Silpat or foil to make cleaning up easier. Roast until tender.
 In the meantime, drizzle a little olive oil into your soup pot. Add a few sage leaves and heat the oil.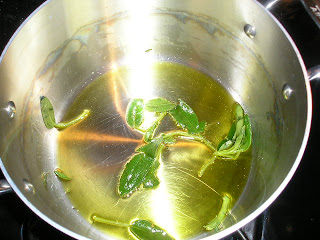


 By now the squash should be done. Grab the ice cream scoop again and dig out the flesh. Add the squash to the pot. Now whip out your immersion blender. I named mine Frenzy. Don't have one? Add the squash to a blender and ladle in some broth. Either way, process until smooth. Put the soup back into the pot and simmer.
  Now here is where you can get more creative. You can add heavy cream to the pot now for a richer soup. When serving, you can garnish each bowl with chopped pecans and/or fried sage.
 Now for the sweet potato corn soup. Start by infusing some olive oil with sage, just like the roasted butternut squash soup. Add onion and saute.


 Once the flavors meld, puree. Again, the immersion blender rocks.
  Strain the soup. (I don't like the corn bits.) I finish the soup with cream. Adjust the seasonings. I throw in a pinch of sugar. When I dish it up into bowls, I add a little bit of brandy.