Showing posts with label French whisk. Show all posts

Saturday, December 13, 2008

Buy The Book #4: Cook's Illustrated 2003 Annual

Whenever I can knock out a killer breakfast, I am a happy camper. One of the things I do love for breakfast is cornmeal pancakes. Many a day I opened a box of Jiffy for pancakes and not cornbread. That is until I discovered lemon-cornmeal blueberry pancakes in 2003.
This was the year I bought my first CI Annual. If you haven't figured it out, I believe the folks at Cook's Illustrated author the best recipes. Perhaps a third or more of my cookbook collection is from CI. I think this recipe is the one I use most from the 2003 volume. It truly is a breakfast favorite.
Let's get started. This is all you need to make these wonderful pancakes. I would've preferred fresh blueberries, but it's winter. I'll make do with frozen. And yes, the use of prep bowls really does help.
Start by stirring your lemon zest and lemon juice into the milk. Yep. You're making buttermilk. Let it sit for a while to thicken. You can easily use buttermilk and just add the zest. I feel Sunday biscuits coming on, so I'm saving the real buttermilk for that.
Mix the egg and melted butter.
Now, mix all of your dry ingredients. I do this in two stages, cornmeal and flour and then the baking powder, baking soda, sugar and salt into the cornmeal and flour.
Dump the egg mixture into the milk and give it a whisk. Next, make a well in the center of the dry ingredients and mix in the milk mixture. I start with a whisk and then switch to a spatula. Please don't overmix. Lumps are okay. Completely smooth batter means tough pancakes and who wants that?
I used a large scoop to portion the batter. I don't care about perfectly round pancakes. This is a good thing because I can't make them! I do have some egg rings that I could use if I needed to impress somebody. After the batter is in the pan, sprinkle the blueberries across each pancake.
I am pining for a Le Crueset double-burner reversible grill and griddle. Until then, a large skillet will have to do. I added a little more oil than I should have and the heat was up a touch higher than it needed to be. Therefore, the first batch fried a little. Once you see the edges of the pancakes start to dry out (you'll see the bubbles), give the pancakes a flip. On my stove, liquids tend to pool on one side, so one pancake got a lot of hot oil. Can you tell which one?
When the bottom side has set, remove the pancakes to a plate and work it out with some syrup and butter. I also had some maple glazed turkey bacon going on the side. Add some rich coffee made from freshly-ground beans and you'd think you're at a fancy restaurant.
A couple of things would've made this better -- breakfast in bed and breakfast before noon! No matter. All was right with the world after the first bite.
These also freeze well. I stack them between parchment paper. I intentionally undercook each batch after the first, so that the frozen ones will be a little more forgiving when reheated.
Tools of the trade:

Monday, August 18, 2008

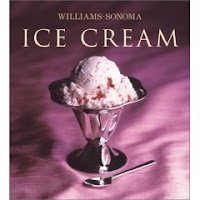
Buy The Book #1: Williams-Sonoma Ice Cream

Welcome to the series where I cook something from each of my cookbooks. I have 85 and counting, so we have a lot of possibilities. I follow the recipe by the book to prove that you should buy the book. First up? Williams-Sonoma Ice Cream. Let’s make fresh strawberry ice cream!

I have to admit, I struggled with the book choice for ice cream. It was this book vs. Ben & Jerry's Homemade Ice Cream & Dessert Book. I chose WS because its recipe didn’t contain any eggs. I figured no eggs would be slightly healthier. Besides, there will be Cherry Garcia from the Ben & Jerry’s book later. (It’s my all-time favorite ice cream.)

This is so simple! Dairy (cream and milk), sugar and vanilla are the base. Mix all of the liquids. Add a pinch of salt.

The sugar is next. Add the dairy and stir until the sugar dissolves. The instructions say to let the base sit out for 15 minutes before refrigerating. Stir occasionally. I’m not sure why you couldn’t put it in the refrigerator immediately. Anyhoo, chill the base for at least three hours.

In the meantime, get the strawberries. Quarter them and let them sit for an hour. I added a little sugar and Kirsch. Mash about half of them.

Add the strawberries and their juice to the base.

Let’s churn!!!! To the ice cream maker we go.

Churn, Baby Churn!

You should now have yummy soft-serve ice cream. Hey, stop eating it! Pour it into a freezer-safe container.

Press plastic wrap right down on the surface. Put the lid on and freeze.

Do not try to lick the ice cream maker.

Well now. Isn't that special?

Tasty. Tasty. Tasty.

Monday, July 7, 2008

More Minis

My love affair with mini desserts continues! Also the cheap side of me kicked in. I love to go to bakeries and look at the fruit tarts. They are so elegant and beautiful. I never buy them because I think they are really expensive. I finally got up the nerve to make one myself!

One of my favorite cookbooks is Williams-Sonoma's Tools & Techniques. It has recipes for both the tart dough and the pastry cream. Here we go. Let's start with the pastry cream. Grab a vanilla bean. Split it with a pairing knife and scrape the seeds out. Place the seeds and the pod into a pot with milk to steep over medium heat.
Whisk the egg yolks and sugar. I whisk until the mixture turns to a pale yellow.
By now, your milk and vanilla should be warm enough.
Slowly pour a quarter of the warm milk into the eggs while whisking constantly.
Pour the egg mixture into the saucepan. Whisk constantly and cook until the mixture thickens and comes to a boil. Pour the mixture into a sieve placed over a bowl. Strain out the solids.
Add the butter to the strained cream and stir until it melts.
Place plastic wrap over the pastry cream. (Make sure it's touching the cream so a skin won't form.) Refrigerate for at least two hours.
Let's make the tart dough now. Get all of your dry ingredients into the food processor. Please, please, please, weigh your flour.
Take the dry ingredients for a spin. Add the butter.
Process lightly and add the egg and heavy cream.
Bring the dough together in a ball. Flatten into a disc. Wrap in plastic wrap and refrigerate for two hours
Here's the challenging part for me, rolling the dough. Sprinkle well with flour and grab a French rolling pin.
Yeah. Lesson learned: don't roll dough in a hot house!
I quickly wised up an placed a sheet pan in the refrigerator. I rolled the re-chilled dough on it. I used a fluted cutter to make rounds for my muffin pan.
Sorry. No more work-in-progress pics. My kitchen was still hot and I had to move quickly. I placed the rounds in a standard muffin pan I used a tart tamper to shape them. Then I docked them with a fork. Here's the finished product.
Tools of the trade: