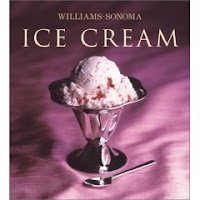
 Welcome to the series where I cook something from each of my cookbooks. I have 85 and counting, so we have a lot of possibilities. I follow the recipe by the book to prove that you should buy the book. First up? Williams-Sonoma Ice Cream. Let’s make fresh strawberry ice cream!
I have to admit, I struggled with the book choice for ice cream. It was this book vs. Ben & Jerry's Homemade Ice Cream & Dessert Book. I chose WS because its recipe didn’t contain any eggs. I figured no eggs would be slightly healthier. Besides, there will be Cherry Garcia from the Ben & Jerry’s book later. (It’s my all-time favorite ice cream.)
This is so simple! Dairy (cream and milk), sugar and vanilla are the base. Mix all of the liquids. Add a pinch of salt.

The sugar is next. Add the dairy and stir until the sugar dissolves. The instructions say to let the base sit out for 15 minutes before refrigerating. Stir occasionally. I’m not sure why you couldn’t put it in the refrigerator immediately. Anyhoo, chill the base for at least three hours.

In the meantime, get the strawberries. Quarter them and let them sit for an hour. I added a little sugar and Kirsch. Mash about half of them.

Add the strawberries and their juice to the base.

Let’s churn!!!! To the ice cream maker we go.

Churn, Baby Churn!

You should now have yummy soft-serve ice cream. Hey, stop eating it! Pour it into a freezer-safe container.

Press plastic wrap right down on the surface. Put the lid on and freeze.

Do not try to lick the ice cream maker.

Well now. Isn't that special?

Tasty. Tasty. Tasty.


 Use kitchen shears to cut the pita in half. Looks like I did alright this time.


 This picture doesn't do it justice, but it has doubled in size.
 Take the dough out and gingerly fold it. Allow it to rise for two hours.
 Yep. It doubles again.
 Shape the rolls and dip them in butter. Allow them to rise. Hey, you only have to wait 1 1/2 hours this time. You saved 30 whole minutes!


 Add the seeds and pod to a pot of dairy.
  Heat on medium heat for five minutes, or until bubbles form around the edges of the pan. Okay, so I had bubbles all over the pan.
  Meanwhile, whisk the egg yolks, sugar and remaining dairy in a bowl. Temper the yolks with the warm mixture.
 Now, set up a straining and rig: large bowl of ice. Smaller bowl nestled inside. (I like using an 8-cup measuring cup.) Place a strainer over the smaller bowl. Strain the custard.
  Once it's strained, stir occasionally to cool (don't let a skin form.) When it's cool enough to refrigerate, cover with plastic wrap and refrigerate. Make sure the wrap is touching the top of the custard. Refrigerate overnight. Now you may entertain yourself by licking the spoon.
  Time to break out the ice cream maker!!! I use a KitchenAid stand mixer and the Ice Cream Maker Attachment. This is a great combo if you are short on counter or storage space. I store the attachment in the freezer. That way it's ready when I need it. Turn the mixer on and pour in the custard.


 Process until the mixture forms a ball ... or something close to a ball. OK, at the point it all clumps together, you're good.
 Knead the dough a for a few minutes by hand until it's smooth and firm. Place it into an oiled bowl and cover with plastic wrap. Let it rise until it has doubled in size, about two hours. Divide the dough into four balls. (I always use a scale for this part.)
 Shape each ball by pulling down on the sides of the dough and tucking them underneath the rest of the dough. You'll can feel when you need to stop this process because the dough will start to fight back and become harder to pull. Next, roll the ball on your board until the top is smooth. Place the balls back into the oiled bowl, cover with plastic wrap and let them rise for an hour.
 Transfer the pizza from the peel to a screaming hot pizza stone for the signature crispy crust. I can't show you my stone because it is an embarrassment. I have dropped and burned so much stuff on it, it has changed colors twice.