Saturday, May 31, 2008

Bean Dip??

Hummus got me through grad school, the second time around. Many a meal was made from pita, hummus, kalamata olives, feta and tabouleh. I couldn't believe it was made from beans. I've since discovered that chickpeas are one of the few beans I like.


This recipe is from the Food Network Kitchens. I add the tahini to the food processor first. Tahini is like peanut butter. It's made from sesame seeds and tends to separate. Stir it well before measuring.


Add the lemon juice and give it a spin.


Add the garlic, chickpeas, salt and pepper. Process until smooth.


Stream in the olive oil while the machine is running.


Garnish with parsley. I added paprika for color. Look for some pita and get busy.

Tools of the trade:

Thursday, May 29, 2008

My Favorite Salad


This is my favorite salad of all time. The recipe is from Sue Weiler, a chef and instructor in Cleveland. I hadn't had the salad in a couple of years. Low and behold, I walked into Whole Foods one Saturday and smelled the distinct aroma of fried Halloumi cheese. It was on! Thanks to Sue, I had the perfect recipe for this.

Halloumi is one of the coolest cheeses ever. It doesn't melt, so you can grill it or fry it.

It's a firm cheese and slices easily.


Brown on both sides in a nonstick skillet over medium heat.


Let's get going on the salad dressing. Whip out your mini food processor. Miracle has a mini bowl, so I used that. Start with garlic and dill. I like a lot of both.

Take it all for a spin.


Add fresh lemon juice and a little honey. Stream in the olive oil while the processor is running. You should end up with something like this.


Now that the dressing is done, let's move on to the rest of the salad. Get some red and green grapes. Slice them in half.


Place your salad greens on a plate and add a couple of tablespoons of dressing.


Toss the greens and add the grapes and cheese. Good eating is immediately ahead!

Tools of the trade:

Monday, May 26, 2008

Welcome Summer (Unofficially)

Memorial Day is the first official grilling holiday of the year and I felt compelled to do my part to keep the tradition alive! I kept it simple this year -- turkey burgers, beans and lemonade. I would have loved grilled corn, but with braces, it's just too much work to eat it. The OXO Corn Stripper is on my gadget hot list this summer. I'm also holding out for the mango splitter and pineapple slicer, but I digress.

The turkey burgers you've seen before, so let's get to the beans. My mother clipped this recipe from a magazine and taped it to the inside of one of the kitchen cabinets, right near the phone. She also kept family news clippings posted here as well. It was there for as long as I could remember and I'm 34. I never remember her making these, but my stepmom did later. This is my version.
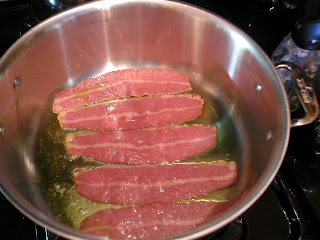
Start with some bacon. My home is a pork-free zone, so this is turkey bacon. All turkey bacon is not created equal. In terms of taste, I prefer Wellshire Farms, Trader Joe's and Louis Rich. You need to help the bacon along by adding a couple of tablespoons of olive oil.


Cook until crispy. Reserve the fat. While the bacon is frying, get started on the veg -- bell peppers, onion and garlic. Man, it's time to oil my board.


Add the chopped peppers and onions to the reserved bacon fat and olive oil. Season with salt and pepper.


To keep the garlic from burning, give the other veggies a head start by adding them to the pot first. They create a nice bed for the garlic.


Once the veggies soften, add ground turkey. I was multitasking and grilled the turkey outside; I wanted the smokey flavor in the beans.


Crumble this into the veggies. You can chop the meat with a knife or take it for a spin in the food processor. I was having a pretty low-tech day, so I used a wooden turner to break it up in the pot. It's a nice way to work out aggression.

Remember the bacon you fried earlier? Chop and add to the pot.

Add the beans. I'm using Bush's Vegetarian Baked Beans. I really wanted some kidney beans too, but I didn't have any on hand.
Stir the beans and veggies. Now comes the fun part. Whip out your yellow mustard, barbecue sauce, ketchup and molasses.
For extra kick and more depth, I added a couple of chipotle chilies and a tablespoon of adobo sauce.
Cover and bring to a simmer on the stove.
Transfer to a 350 degree pre-heated oven and bake, uncovered. The beans should be thick and dark on the top.
I'll let you in on my shameful accident. I did my holiday cooking on Sunday, after participating in Chicago's Bike the Drive. A mere 15 miles later, I was tired! (I'm out of shape, but trying to do better.) I decided that it would be silly to come home and shower just to go outside and grill. I'd just have to shower again. I was afraid that if I slowed down, I'd sleep for the rest of the day.

Therefore, I took my ambition straight to the kitchen after the ride. After the beans went into the oven, I showered. All I had to do now was take the beans out of the oven and I could sleep guilt-free for the rest of the day! It was a great plan, until I dropped the six-quart pot of beans. I don't know what happened. I was using two oven mitts and the pot just slipped. It landed, right-side-up, on the open oven door. Unfortunately, half the beans sloshed out on the oven door and floor. That's why the beans aren't completely dark in the picture, the rest of the dark top portion ended up in the trash can :-(
Moving on to the lemonade. This is Ina Garten's recipe with a twist from Giada De Laurentiis and was made after a much-needed nap. You'll need fresh lemon juice, ice, water and fresh basil. My lemons were so small that I could use the lime part of my double juicer.
Add the juice, ice, water and sugar to a pitcher. I used Splenda instead of sugar.
This was my first time trying lemonade with basil, so I added the basil by the glass and instead of adding it to the pitcher. Besides, I had dreams of making a great Arnold Palmer on Memorial Day; I didn't know how the basil would work with the sweet tea.
I took a basil leaf, crushed it with my fingers and rubbed it in the inside of the glass. I then added the chilled lemonade and floated a sprig of basil in the glass. It was great!
Tools of the trade:

Saturday, May 17, 2008

Baby Heaven

Given my quest to lose weight and my gigantic sweet tooth (we've discussed this before), I have to make mini versions of my desserts. I decided to try my first-ever key lime pie.


I used a mini cheesecake/tartlet pan from Williams-Sonoma. The removable bottoms really make getting the baby pies out of the pan a breeze.

This has to be the world's easiest pie. Once again, the folks at Cook's Illustrated didn't let me down. After reviewing multiple recipes, I chose theirs because they promised cooking the filling would provide amazing texture and increase flavor. I was sold.

Here we go. This is very simple recipe, but it allows me to use some great tools gadgets and we all know I love a good gadget.

Start with the filling because it needs to sit aside to thicken. Whisk the egg yolks and zest until the mixture turns light green. I didn't quite get there. New gadget alert: Microplane Citrus Tool! Available at Williams-Sonoma. Beat in the sweetened condensed lemon juice and then the lime juice. Let this sit while you work on the crust.


Break out your version of Miracle and pulverize your graham crackers.
Toss in the sugar and spin them again. Add the butter and spin them once more.


Although my pan was nonstick, I still gave it a spritz with a nonstick cooking spray. Next I spooned the crust into each cup.


Next I used a tart tamper to form the baby crusts. We're up to six gadgets so far (Microplane, citrus press, French whisk, food processor, mini cheesecake pan and tart tamper)!

Here's where I goofed. I baked the crusts for the recommended 15 minutes. I should've done 10 minutes. I didn't take into account my crusts were smaller and the dark finish of the pan. They were still quite edible.


Allow the crusts to cool completely. Now grab an ice cream scoop and add the filling to the crusts. Bake for 15 minutes. Cool completely in pan. Pop them out and refrigerate for at least three hours. Aren't they cute??!


Top with sweetened whip cream and lime zest. How adorable!


Yea!

Tools of the trade:

Tuesday, May 13, 2008

Breaking Bread

I had a very stressful day yesterday. So much so that when I took it to the bed for a much needed 5 pm nap, I tossed and turned forever. When I woke, I didn't feel much better. This is how I ended up baking bread at midnight.

There is something so calming about fooling around with dough. Whether it be pasta dough or bread dough, it soothes me. I used to think it was baking that did it for me, but it's really about dough. Although I love to bake desserts, I've found that making those can be stressful too. Have you ever tried to tort and decorate a cake?

Pita bread is so cool. The little dough pockets make the containers for all types of sandwich fillings. I tend to stick with hummus, tomatoes, olives, feta, etc. I also like to cut the pita into triangles, brush with olive oil, sprinkle with herbs and spices and make a sort of low-fat chip. Quite tasty. This is my second attempt a making pita bread; it's been years since the first try. Hopefully, these will be better. This recipe is from Tyler Florence.


Mix the yeast, warm water and sugar in the bowl of your standing mixer. Let the mixture stand until the yeasts become foamy.


Add the flour, slowly. It's a whole 3 1/2 cups! I used 2 C of bread flour and 1 1/2 C of whole wheat flour. I kneaded the dough on low speed until all the four was incorporated.

Then I turned it up to #4 and let it rip for about 10 minutes. This was a departure from the recipe. I like for the dough to clean the bowl.


The dough was sticky. I plopped it onto a well-floured board and kneaded it by hand until smooth.


After 90 tortuous minutes in a covered oiled bowl (the dough, not you) and you should have beautiful puffy dough. Punch it down and divide it into eight pieces. A bench scraper helps divide the dough.


Shape the dough into balls and allow them to rest, covered for 15 minutes. This keeps the dough from fighting back when you roll it out.

Roll each piece into a circle, or something close to a circle. I put the pitas between towels and let them rise for 20 more minutes. This was another variation from the recipe.


I placed the bread on a 500 degree pizza stone using a peel. I can't share any pictures because my pizza stone is ... well let's just say it's not fit for public viewing! Bake until the bread puffs up. How cool is that? Now I have to admit that not all puffed up properly. Of the six I baked immediately, three rose properly.


As the bread cools, it deflates. Well it's supposed to. After five minutes on the cooling rack, I mine had not deflated. I used a toothpick to poke holes in the side of the bread and lightly pressed down.


The ones that didn't rise made great flatbread. I purposely rolled some improperly and seasoned them to make zesty flatbread.

Use kitchen shears to cut the pita in half. Looks like I did alright this time.
Tools of the trade: