I'm so not feeling the Christmas spirit this year. I want a shirt that says, "Bah. Humbug." However, the bright sunny morning cheered me a little and I decided to celebrate the first day of me not checking my Blackberry all day with some scones. Not just any scones -- maple-glazed pumpkin scones to be exact. I wanted to make these over Thanksgiving, but a family emergency kept me from my kitchen most of my time off.
You've seen the scone recipe before, so let's get to it. It starts pretty much the same; pulse dry ingredients in the food processor. Add cold butter.
Here's the departure: make Trader's Joe's Pumpkin Butter your friend. Y'all might even be best friends after this :-)



Invert.

Slice (do a better job than I did.) Remember to press straight down. I'll show you what happens later when you don't.

I did better on the second round.


Remember my note to press straight down when cutting? Here's what happens when you don't. He's all crooked :-( I'm working on a granite counter, so I use my bench scraper to cut dough. Moving to a cutting board so I can use my knives is too much work. And even still, I think it's just the way I cut and lack of wrist strength. I sometimes have lopsided biscuits too.

Tools of the trade
You've seen the scone recipe before, so let's get to it. It starts pretty much the same; pulse dry ingredients in the food processor. Add cold butter.
Here's the departure: make Trader's Joe's Pumpkin Butter your friend. Y'all might even be best friends after this :-)

Mix it into the cream really well. Instead of a full cup of cream, I used 3/4 C. Add the cream to the flour mixture.

CI has you do this by hand, I just added mine to Miracle and pulsed until it formed a dough.

Now comes the messy part. Dump the dough on the counter. Knead very gently to incorporate all the dry bits. Form a ball or two, depending on how you will shape your scones.

I made two balls because I used a 6" cake pan so I could have mini scones.

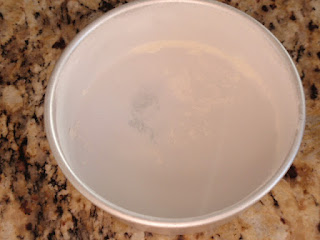
Press the dough into the pan.


Slice (do a better job than I did.) Remember to press straight down. I'll show you what happens later when you don't.

I did better on the second round.

I started with refrigerated instead of my usual frozen butter, so I parked these in the refrigerator while I took a bacon detour.

I did say MAPLE pumpkin scones. No way I was going to have a hot oven, maple syrup on the counter and bacon in the refrigerator without making maple-glazed bacon again.

Back to the scones. I heated some butter and maple syrup together.

I gave the scones a beautiful brush-on tan and to the oven they went.

Here's what I got.

Absolutely delicious! The texture was closer to a biscuit or even cake. I prefer my scones on the drier side, but the flavor made up for the break with tradition. The pumpkin butter was pretty sweet, so I would knock out some of the sugar when I try these again. The maple syrup kept the outside of the scones from getting hard, so next time, I'll make half with the glaze on before baking and put the glaze on the other half after baking to see which I like best.
With Teavana's English Breakfast Tea, these made a wonderful morning treat. On a side note, here's another vote for Silpat -- the burnt syrup just flakes off. Easy cleanup.


Tools of the trade
- Kitchenaid Food Processor
- Wilton Cake 6" Deep Pan
- 2-Cup Pyrex Measuring Cup
- Silpat
- OXO Pastry Brush
- OXO Bench Scraper


 Use kitchen shears to cut the pita in half. Looks like I did alright this time.

 Toss the butter in the flour mixture. Process using short pulses until the mixture has a sandy texture.
 Mix with a spatula, gently, just until large clumps form.
 Place the dough on the board and knead it just enough so that it comes together. Be gentle! Shape into a rectangle.
 Bake at 425 degrees.
 Aren't they cute?
 Let these sit for no more than two hours. They will keep longer than two hours, but the texture will degrade.
 I think were ready to bring it all together. Split the biscuit by hand. Add a generous amount of strawberries.

 Yesterday was Good Friday and it snowed! (This will make it very hard to wear white linen for Easter.) What better time to write about the Saturday I spent making soup? Roasted butternut squash soup is always a favorite. I had some sweet potatoes on hand and I wanted to see what I could do with those and some corn. The result was fabulous. It's now on my list of favorites too.
 Place the halves cut side down on the baking sheet. Use a Silpat or foil to make cleaning up easier. Roast until tender.
 In the meantime, drizzle a little olive oil into your soup pot. Add a few sage leaves and heat the oil.


 By now the squash should be done. Grab the ice cream scoop again and dig out the flesh. Add the squash to the pot. Now whip out your immersion blender. I named mine Frenzy. Don't have one? Add the squash to a blender and ladle in some broth. Either way, process until smooth. Put the soup back into the pot and simmer.
  Now here is where you can get more creative. You can add heavy cream to the pot now for a richer soup. When serving, you can garnish each bowl with chopped pecans and/or fried sage.
 Now for the sweet potato corn soup. Start by infusing some olive oil with sage, just like the roasted butternut squash soup. Add onion and saute.


 Once the flavors meld, puree. Again, the immersion blender rocks.
  Strain the soup. (I don't like the corn bits.) I finish the soup with cream. Adjust the seasonings. I throw in a pinch of sugar. When I dish it up into bowls, I add a little bit of brandy.